UV Printing Cost: An Advanced Economic and Technical Analysis – A Complete TCO Guide

The price of ink is just the tip of the iceberg. The real cost of UV printing hides in dozens of line items that most companies only discover after the machine is already running on the floor. This guide shows you how to calculate TCO – total cost of ownership – and where the savings, or the losses, actually come from.
Table of contents
- Introduction: Why ink price is only the tip of the iceberg
- The TCO model – definition and components
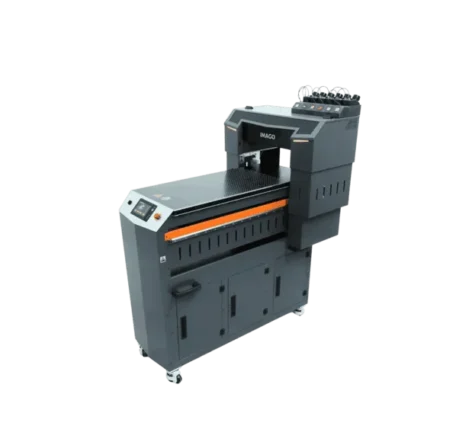
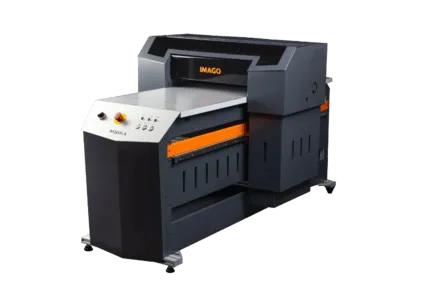
- Technology split: Flatbed vs Roll-to-Roll vs Hybrid
- The math of direct and indirect cost
- Cutting ink consumption at the RIP level
- Variable Dot technology
- The economics of special printing: white, varnish and layering
- Mechanical parameters and operational output
- The controller and screening algorithms
- Hidden costs: technological waste and maintenance
- Printhead comparison: Ricoh vs Kyocera
- LED UV vs traditional lamps – impact on TCO
- A practical ROI and TCO calculation
- FAQ: Common questions about UV printing costs
- Summary
1. Introduction: Why Ink Price Is Only the Tip of the Iceberg
In any serious profitability analysis of wide-format UV printing, judging a machine by its price per milliliter of ink is a methodological mistake. It’s like rating the cost of owning a car on fuel price alone, ignoring depreciation, insurance, servicing, tyres and everything else.
Industry research puts the purchase price of a printing device at only 10-20% of the total cost of ownership over five years. The remaining 80-90% sits in operating costs that get routinely underestimated, or left out of the decision entirely.
UV printing cures specialist inks instantly using ultraviolet light, which makes it possible to print on glass, metal, wood and ceramics with sharp detail and intense, durable colour. The technology runs across the graphics and advertising industry: signage, packaging, promotional materials.
Two cost realities are worth holding onto from the start. Printing on non-standard substrates like glass, metal or wood costs more than printing on paper or film. And UV printing is more expensive to run than traditional methods such as solvent. Both feed straight into your total production cost.
The problem with simplified math
A common scenario starts with the question readers ask first: much does uv printing really cost when you look beyond the sticker price and compare the overall cost. A year later the picture looks very different. The cheaper ink needs a thicker layer to reach the same saturation, the heads clog more often, and the machine slows down on multi-layer jobs. These factors can significantly affect the real cost per square metre. Good-quality compatible inks can match the original on quality and durability at a lower price, but only with the right pairing of media and print settings.
What the true cost of UV printing covers
To get an honest number, you need a TCO (Total Cost of Ownership) model that brings together:
- Capital expenditure (CAPEX)
- Operating costs (OPEX)
- The specific technology behind the device
- Hidden costs (material waste, downtime, operator turnover)
- Consumables – inks and the parts that wear out – which carry real weight in print cost and in where savings appear
- The key factors in the overall cost structure, including all the inputs, associated costs, additional costs, and the project specifications that shape pricing
UV printing works on acrylic, wood, metal, glass, plastic and paper, and the substrate you choose, along with ink laydown, clogging, and speed, drives cost far more than ink price alone.
A well-organised workflow is one of the strongest tools for cost control. It can lift productivity by 20-30% on the same resources, which feeds directly into margin.
This article walks you through every component of UV print TCO, showing where costs really build up and how to bring them down.
2. The TCO Model – Definition and Components
TCO (Total Cost of Ownership) is the full cost of owning a device over a defined period. For UV plotters and printers it covers far more than the purchase price – it takes in every expense tied to running the machine across its entire service life, including consumables and service parts such as inks and printheads.
The structure of TCO in UV printing
CAPEX (Capital Expenditure) – the upfront investment:
- Purchase price of the device
- Installation and commissioning
- Initial operator training
- Supporting infrastructure (ventilation, compressed air, power)
- RIP software and licences
- Jigs, fixtures and tooling
OPEX (Operating Expenditure) – the running costs:
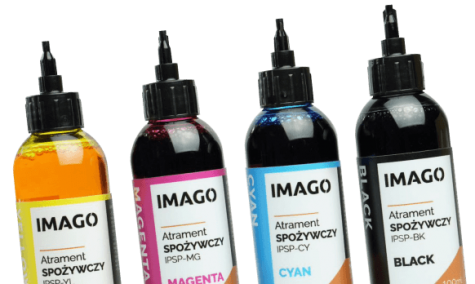
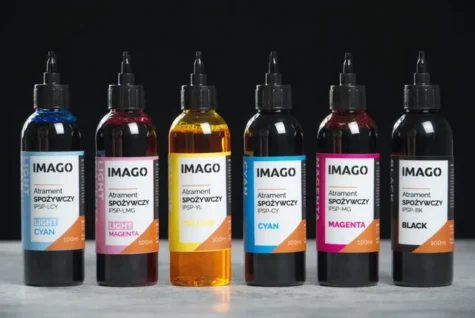
- Inks (CMYK, white, varnish, primer)
- Media (substrates for printing)
- Electricity
- Wear parts (filters, dampers, wipers) – consumables also include the inks and components a printer needs to stay in production
- Service and maintenance
- Printheads (replacement)
- UV lamps / LED modules
- Labour (operator cost) – operator wages are a significant share of total cost of ownership
- Downtime (the cost of not producing)
Print cost, then, depends not only on capital and operating outlays but also on the range of end products the technology lets you make, which shapes the whole cost structure.
The TCO formula
A simplified TCO formula to help calculate uv printing cost for a UV plotter over five years:
TCO = CAPEX + (OPEX_annual × 5) + Hidden_costs

Where:
CAPEX        = Device price + installation + training + infrastructure
OPEX_annual  = Inks + media + energy + service + parts + labour
Hidden_costs = Downtime + material waste + operator turnover
For a uv printing business, these OPEX items are ongoing drivers of printing cost that shape profitability across the wider printing business.
Why TCO changes the picture
Ink is only part of the cost. A device that costs more upfront but uses less ink and energy, needs servicing less often and produces less waste can help you save money over time and land at a lower TCO than the “cheap” alternative.
What matters when choosing UV technology is the ratio of print quality to what you spend on materials, running costs and service. That is also where workflow choices and machine fit support cost reduction. That’s where you get the best quality for your money.
This is the basic way to calculate uv printing cost and estimate printing cost over time:
3. Technology Split: Flatbed vs Roll-to-Roll vs Hybrid
The choice between a flatbed, a roll-to-roll (RTR) or a hybrid plotter sets your fixed-cost structure and shapes the entire TCO. Technical parameters, available features and the maximum print thickness a machine handles all factor in, since they define what you can produce and at what quality.
Flatbed plotters
Characteristics:
- Built for rigid media (glass, metal, acrylic, wood, boards)
- Acrylic is a popular, affordable UV-print substrate, and the technology also produces durable, attractive prints on metal and wood, which widens the range of applications
- Working area defined by the size of the table
- Maximum object height (print thickness): typically 5-15 cm, which allows printing on media of varying thickness and creating three-dimensional effects
- Print on different backgrounds and with a white underprint, for special effects and high quality on complex surfaces
- Printing on non-standard materials like glass, metal or wood costs more than on standard substrates such as paper or film
Impact on TCO:
- Higher initial cost (table construction, vacuum systems)
- Larger footprint
- Higher depreciation cost per m² of production floor
- Minimal material waste (no roll lead-in)
- Ideal for short runs and varied objects
When a flatbed lowers TCO:
- Frequent job changes (short runs)
- Personalisation and prototyping
- No need to cut after printing
Roll-to-Roll plotters
Characteristics:
- Printing on flexible roll media (films, banners, wallpaper, papers)
- Working width: typically 1.6-3.2 m
- Very high throughput (the EFI Pro 32r+, for example, reaches 265 m²/h)
Impact on TCO:
- Faster depreciation at high volumes
- Lower cost per m² on long runs (UV print is most often billed per square metre)
- Lead-in waste (1-2 m on every roll change)
- Requires finishing (cutting, lamination)
When RTR lowers TCO:
- Mass production (banners, backlit, wallpaper)
- Long runs of the same design
- Applications that need large areas
Hybrid plotters
Characteristics:
- Combine flatbed and RTR functionality
- One machine handles both streams of work
- Example: EFI Pro 30h (up to 230 m²/h, 3.2 m width)
- A practical answer for shops with mixed production needs
Impact on TCO:
- Higher initial investment
- Maximises machine utilisation (less idle time)
- Removes the cost of owning two separate machines
- Flexibility to take on varied jobs
When a hybrid lowers TCO:
- A mixed order book (both rigid and flexible media)
- Limited floor space
- A need for flexibility without buying two devices
How each type affects TCO
| Type | CAPEX | OPEX/m² | Best fit |
|---|---|---|---|
| Flatbed | High | High at large volumes | Short runs, rigid media |
| Roll-to-Roll | Medium | Low on long runs | Mass production, films, banners |
| Hybrid | Highest | Depends on the job mix | A varied production portfolio |
4. The Math of Direct and Indirect Cost
A proper UV print cost calculation means separating direct costs (which scale with volume) from indirect costs (which stay fixed). Tightening the print process – the right print settings, ink savings and efficient component replacement – is central to bringing costs down.
The total print cost formula
The cost model can be written as:
K_total = (C_ink × V_ink + C_media) / S_print + (C_labor + C_energy + C_depreciation) / P_rate

Where:
C_ink          - ink cost (PLN/ml)
V_ink          - ink consumption (ml/m²)
C_media        - media cost (PLN/m²)
S_print        - printed area (m²)
C_labor        - labour cost (PLN/h)
C_energy       - energy cost (PLN/h)
C_depreciation - depreciation (PLN/h)
P_rate         - real throughput (m²/h) - the critical variable
Why throughput is the critical variable
Here’s the key point: with high-throughput technologies (LED UV, Single Pass), the energy and labour cost per unit drops sharply, which pushes ink price into second place on long runs. The right print process depends on your production requirements – an automated, well-tuned process delivers the best output and quality while keeping costs under control, because printer’s efficiency and print speeds directly affect unit economics. On some high-quality or large-format jobs, a slower speed is still the better choice to maintain precision.
This model converts hourly and material inputs into cost per square meter for each square meter printed.
A worked example
Assumptions:
- Ink cost: 400 PLN/l
- Ink consumption: 15 ml/m² (CMYK, 100% coverage)
- Operator cost: 50 PLN/h
- Energy cost: 20 PLN/h
- Depreciation: 30 PLN/h
| Parameter | Slower plotter (20 m²/h) | Faster plotter (50 m²/h) |
|---|---|---|
| Ink cost/m² | 6.00 PLN | 6.00 PLN |
| Labour cost/m² | 2.50 PLN | 1.00 PLN |
| Energy cost/m² | 1.00 PLN | 0.40 PLN |
| Depreciation/m² | 1.50 PLN | 0.60 PLN |
| Total cost/m² | 11.00 PLN | 8.00 PLN |
This example calculation shows that a printer’s efficiency and real print speeds determine whether a higher-quality mode simply becomes a slower speed that raises unit cost. For labor costs, one printing operator at 50 PLN/h spread across 20 m²/h adds 2.50 PLN/m², while at 50 m²/h it drops to 1.00 PLN/m². The electricity calculation uses the same logic: with an hourly electricity cost of 20 PLN, the machine adds 1.00 PLN/m² at 20 m²/h and 0.40 PLN/m² at 50 m²/h. As an electricity calculation example, dividing the hourly rate by actual output makes the electricity cost easy to compare between machines. A 34% gap, with identical ink cost. A faster plotter, even at a higher purchase price, can deliver a lower unit cost.
How the cost structure shifts with volume
Example calculation by monthly volume
| Monthly volume | Dominant cost component |
|---|---|
| < 500 m² | Depreciation and labour |
| 500-2,000 m² | Inks and media |
| > 2,000 m² | Inks (provided throughput holds) |
The takeaway: at low volumes, maximise machine utilisation. As production volume rises, the per unit cost typically falls. At high volumes, focus on ink consumption. This electricity figure is a simple calculation example, and labour can also be benchmarked per square meter at about $0.24/m² using a $15/hour operator wage and 500 m² output over an 8-hour shift. Rising demand for personalised and eco-friendly products is also reshaping the cost structure and the technology choice.
5. Cutting Ink Consumption at the RIP Level
Tuning ink use at the RIP (Raster Image Processor) level is the most effective way to cut direct costs without touching the hardware. This is “free” saving – it needs nothing but the right knowledge and settings, especially because UV inks are a massive cost item. Smarter ink usage settings also improve forecasting around UV inks cost. The takeaway is simple: production volume changes the per unit cost, and larger runs benefit from economies of scale compared with one-off custom prints.
GCR and UCR algorithms
UCR (Under Color Removal)
How it works: in neutral (grey) or dark areas that would normally be built from a mix of three chromatic colours (CMY), part of that mix is replaced with black ink (K).
Effects:
- Less consumption of expensive coloured inks
- Faster drying (less ink laid down)
- More stable greys
- Better contrast in shadows
GCR (Gray Component Replacement)
How it works: a more advanced form of UCR. GCR finds the neutral (grey) component in every colour – not just in neutral greys but in saturated chromatic colours too – and replaces that grey component with black ink.
Effects:
- Even greater ink savings than UCR (15-30%)
- Very stable grey reproduction
- Faster drying
- Better results on high-throughput machines
UCR vs GCR
| Feature | UCR | GCR |
|---|---|---|
| Scope | Neutral colours | All colours |
| Ink saving | 5-15% | 15-30% |
| Grey stability | Good | Very good |
| Setup complexity | Simple | Advanced |
Ink limiting
Ink limiting caps the maximum amount of ink laid on a unit of surface, expressed as a coverage percentage (300%, for instance, means up to three full layers of CMYK coverage).
Why it matters:
- Typical UV print limit: 200-300%
- Too high an ink limit means curing problems, layer cracking and longer drying
- Too low an ink limit means lost colour saturation and weak blacks
Recommended ink limit settings
| Application | Recommended ink limit |
|---|---|
| Banners, outdoor applications | 220-250% |
| Printing on glass, metal | 250-280% |
| Printing with a white underprint | 200-230% (CMYK) + white separately |
| Photorealistic applications | 260-300% |
Real savings from RIP tuning
Well-configured GCR and ink limit settings in RIP systems (Onyx, Caldera, EFI Fiery) can deliver:
- 15-30% lower ink consumption
- Faster curing (lower UV lamp energy use)
- Less risk of layer cracking on flexible media
- Better colour repeatability between runs
At 10,000 litres of ink a year (a fair figure for a busy UV shop) and 400 PLN/l, a 20% saving is 800,000 PLN a year.
6. Variable Dot Technology
Modern piezoelectric heads support Grayscale (Variable Dot) technology, firing drops of different volumes. This single capability affects both quality and TCO.
How variable dot works
Heads like the Ricoh Gen5, Kyocera KJ4A and Epson Precision Core can fire drops from 4 picolitres (pl) up to 35 pl or more. The drop size is chosen per nozzle, in real time, based on what the image needs.
Small drops (4-7 pl):
- Used for detail, highlights and smooth tonal transitions
- Reduce graininess
- Need more passes to build saturation
- Lower throughput (m²/h)
Large drops (21-35 pl):
- Build optical density fast in solid fills
- Allow faster printing at lower DPI
- Central to bringing the labour-hour cost down
The relationship between DPI and cost
| Resolution | Relative throughput | Ink consumption | Operating cost/m² |
|---|---|---|---|
| 720×720 dpi | 100% (base) | Base | Lowest |
| 1200×600 dpi | ~50% | +10-15% | Higher ~2× |
| 1440×1440 dpi | ~25% | +15-20% | Highest ~4× |
The point to notice: printing at 1440 DPI uses only marginally more ink than 720 DPI (for the same saturation), but takes 2-4 times longer, which drives the operating cost up sharply.
An optimisation strategy
For mass jobs (banners, backlit):
- 720×720 dpi or 600×600 dpi
- Large drops, fewer passes
- Priority: throughput and low cost
For premium jobs (POS, display, photorealistic):
- 1200×600 dpi or higher
- Small drops for gradients and skin tones
- Priority: quality
For difficult media (dark, textured):
- Larger drops for better coverage
- Higher ink limit
- White underprint where needed
7. The Economics of Special Printing: White, Varnish and Layering
Printing with white ink and varnish is the single biggest cost challenge in UV technology, and it rewrites the standard margin calculation. UV print costs usually run from 5 to 20 USD per square metre, and in Poland average 30-80 PLN/m² for simple prints on standard substrates and 200-500 PLN/m² on premium materials.
A white underprint is common on backgrounds like wood, metal and glass, where it delivers a clean, professional result even on uneven or dark surfaces. Laying down white and varnish takes precise control and the right consumables, which feed straight into the final print cost.
The cost of white ink (TiO₂)
White ink costs more because of its titanium dioxide (TiO₂) content – the pigment that gives it opacity. A typical price gap: 485 PLN/l versus 399 PLN/l for CMYK, around 20% higher.
The real cost, though, sits in the process, not the price per litre:
Flood mode (full white underprint):
- Very high consumption, often more than the combined CMYK total
- Used when the substrate needs full opacity
- Pushes the ink cost per job up sharply
Spot mode (selective):
- White applied only where it’s needed
- Requires a carefully prepared production file (a separate white layer)
- Saves 60-80% against flood
Recommendation: always check whether flood mode is actually necessary. In many jobs – a print on a light substrate with local white – spot mode cuts the cost dramatically.
Layering: Sandwich and Day & Night modes
“Sandwich” printing (Colour-White-Colour):
A typical setup for lightbox or double-sided applications:
- C-W-C (Colour → White → Colour)
- C-W-C-W-C (for maximum opacity and a day/night effect)
A white underprint on backgrounds like wood, metal and glass opens up special effects and widens what UV printing can do. It brings out detail, gives a high-quality finish and makes jobs on complex or uneven surfaces possible.
The impact on TCO
| Print mode | Relative speed | Ink cost/m² | Labour cost/m² |
|---|---|---|---|
| CMYK (standard) | 100% | Base | Base |
| CMYK + White (spot) | ~70-80% | +20-40% | +25-40% |
| CMYK + White (flood) | ~50-60% | +80-120% | +65-100% |
| Sandwich C-W-C | ~33% | +200-250% | +200% |
A machine running a three-layer job (C-W-C) usually slows down threefold or more, depending on the head layout. If standard speed is 50 m²/h, sandwich mode drops it to around 15 m²/h.
TCO implications:
- Labour-hour and depreciation cost per m² triples
- A thick ink layer (often >200% coverage) needs more intensive curing
- That raises UV lamp wear and the risk of overheating the medium
Optimising multi-layer printing
Some plotters – those with a dedicated row of heads for white or varnish – lay down layers without losing speed. That’s a real competitive edge when you cost out finishing effects.
Questions to ask the supplier before buying:
- How many white and varnish channels does the device support?
- Does multi-layer printing require extra passes?
- What’s the real speed in C-W-C mode?
- Do the white heads need more frequent maintenance (recirculation)?
8. Mechanical Parameters and Operational Output
The operator’s choices about print mode translate directly into job profitability. Understanding these parameters lets you manage TCO at the level of everyday work.
Pass count and labour cost
Raising the pass count (from 4-pass to 8-pass, say) improves quality and reduces banding in theory, but cuts print speed in a roughly linear way.
| Pass count | Relative speed | Relative operating cost |
|---|---|---|
| 4-pass | 100% | Base |
| 6-pass | ~67% | +50% |
| 8-pass | ~50% | +100% |
The economics: if a 4-pass job takes 1h and 8-pass takes 2h, operator and energy cost double. On low-margin work like banners, high pass modes can eat the entire profit.
Uni-directional vs bi-directional
Bi-directional:
- The head prints in both directions of carriage travel
- Maximum throughput
- Risk of drop misplacement (lower precision)
- Possible artefacts at high speed
Uni-directional:
- Printing in one direction only
- Higher precision and more consistent curing (constant time between firing and the lamp)
- Cuts speed by about 40-50%
When to use uni-directional:
- Printing on glass and reflective media
- Jobs that need perfect colour registration
- High-resolution printing (>1200 dpi)
A mistake to avoid: running uni-directional with no clear quality reason wastes resources – you lose 40-50% of throughput for no benefit to the customer.
Masking algorithms (Wave/Fuzz)
Error-dispersion algorithms (Wave, Fuzz, Stagger) mask banding by interleaving passes. They don’t slow the carriage much on their own, but they may need a higher pass count to work.
Use:
- Always on for photography and gradients
- Can be switched off for simple graphics (solid fills, text)
- Configured in the RIP software
9. The Controller and Screening Algorithms
The print engine (RIP) decides how a graphic file becomes a bitmap for the heads. The screening algorithm you choose has a direct effect on ink consumption and quality. Experienced users reach for modern screening algorithms to balance quality against cost.
Error Diffusion (FM) vs Halftoning (AM)
Stochastic screening (FM / Error Diffusion):
- Places dots randomly, varying their density
- Eliminates moiré when reproducing raster images
- Smooth tonal transitions with less ink
- No overlap of large dots (less “mud” in shadows)
- Preferred for photographic and artistic printing
Amplitude screening (AM / Halftoning):
- Traditional screening, dots of varying size in a regular grid
- Visible grain at lower resolutions
- Used less often in UV printing
- Can be preferred for reproducing offset prints
The TCO effect: with the right configuration, FM screening uses 5-15% less ink than AM for the same visual result, mainly by avoiding redundant dot overlap.
Firing frequency
The controller has to sync firing frequency (kHz) with carriage movement. Higher-frequency heads (the Kyocera KJ4A against the Ricoh Gen5, for example) allow faster printing while holding drop precision.
What this means: higher frequency = higher m²/h = lower fixed cost per unit.
10. Hidden Costs: Technological Waste and Maintenance Costs
This is the element ROI calculations skip most often, and it can account for 5-10% of total running costs. Regular maintenance extends a UV printer’s life and can cut repair costs by 40%. Maintenance typically runs from $1,000 to $5,000 a year. Machine lifespan is decisive for long-term return – the right maintenance and parts replacement shape both the running cost and whether the purchase pays off.
Purge and cleaning procedures
Every head cleaning wastes clean ink. Purge procedures (forcing ink through under pressure) keep the nozzles open, but they generate waste.
What drives cleaning frequency:
- Ink quality (better inks = less frequent cleaning)
- Environment (temperature, humidity, dust)
- How regularly the machine runs (long idle periods = dried nozzles)
- Head design (built-in heating, recirculation)
Heads compared on maintenance
| Feature | Heads without heating | Heads with heating |
|---|---|---|
| Temperature sensitivity | High | Low |
| Purge frequency | Higher | Lower |
| Ink lost to maintenance | 3-5% | 1-2% |
| Suitability for white/varnish | Limited; on setups with two print heads, maintenance demands can be higher | Good; regular preventative care extends the life of UV lights and print heads, reducing replacement frequency and cost |
Lamp and wear-part consumption
UV lamps (mercury):
- Lifespan: around 500-1,000 h
- High energy use
- Generate heat (risk of media deformation)
- Replacement cost: significant
LED UV lamps:
- Lifespan: 10,000-20,000+ h
- Use a fraction of the energy
- Minimal heat
- Higher CAPEX, lower OPEX
Other wear parts:
- Ink filters – replaced every 3-6 months
- Dampers (sub-tanks) – life depends on purge intensity
- Head wipers – replaced every 1-3 months
- Encoder strips – replaced when contaminated
Material waste (roll lead-in)
In roll printing (RTR), every roll change wastes material on tensioning and calibration (the lead-in).
Example:
- Lead-in loss: 1-2 m of material
- On short runs (5 running metres) a 1-2 m loss is 20-40% waste
- On long runs (500 m) the loss is marginal (<1%)
What this means: for short runs, flatbed can have a lower TCO despite a higher unit cost, because it eliminates lead-in waste.
Operator turnover – the hidden cost
Turnover among operators in the print industry runs as high as 25% a year. Replacing one operator costs you:
- Recruitment (HR time, job ads)
- Training (2-4 weeks at lower output)
- Beginner mistakes (rejects, damage)
- Lost process knowledge and experience, which is decisive for efficiency and for keeping UV print costs down
Estimated cost of losing an experienced operator: 15,000-30,000 PLN (source: Polish Agency for Enterprise Development, PARP).
Devices that are ergonomic, intuitive to run and undemanding on service reduce operator turnover, which feeds back into a lower TCO.
11. Printhead Comparison: Ricoh vs Kyocera
The printhead technology you choose is fundamental to long-term TCO. So is the choice of UV printer itself, since the printer is what underpins a company’s stability and growth.
Ricoh Gen5
Characteristics:
- Widely used in mid-range UV plotters
- Piezoelectric technology
- Drop: from 7 pl
- Native resolution: 1200 dpi
TCO advantages:
- Lower unit head cost
- Broad availability (easy replacement)
- Good support across ink formulations
Drawbacks:
- May need more frequent purge cycles
- No built-in heating (sensitivity to cold inks)
- Lower firing frequency than the competition
Kyocera KJ4A
Characteristics:
- Used in industrial and Single Pass plotters
- Built-in ink heating
- Better flow stability
- Higher firing frequency
TCO advantages:
- Less waste on purge
- Better stability with difficult inks (white, varnish)
- Higher throughput (m²/h)
Drawbacks:
- Higher head cost
- Higher cost if one fails
- Less flexibility in ink choice
The economics side by side
| Parameter | Ricoh Gen5 | Kyocera KJ4A |
|---|---|---|
| Head cost | Lower | Higher |
| Purge waste | Higher (3-5%) | Lower (1-2%) |
| Throughput (m²/h) | Standard | Higher |
| Working with white/varnish | Needs attention | Better stability |
| Best for | Low/medium volumes | High volumes, industrial |
Bottom line: for low volumes and a tight budget, the Ricoh Gen5. For high volumes and industrial production, Kyocera or a similar industrial head.
12. LED UV vs Traditional Lamps – Impact on TCO
The curing technology has a dramatic effect on long-term TCO. In UV printing, the inks cure under UV light, which fixes the print instantly.
Mercury lamps (traditional UV)
Characteristics:
- Lifespan: 500-1,000 h
- Power draw: high (several kW)
- Generate significant heat
- Need warm-up time
- Emit the full UV spectrum (including harmful UVC)
Impact on TCO:
- Frequent lamp replacement (cost plus downtime)
- High energy bills
- Cooling required (hall air conditioning)
- Limits on printing heat-sensitive media
- Health and safety requirements (eye protection, ozone ventilation)
LED UV
Characteristics:
- Lifespan: 10,000-20,000+ h
- Power draw: low (a fraction of traditional lamps)
- Minimal heat (cold curing)
- Instant start (no warm-up)
- Narrow spectrum (safer)
Impact on TCO
| TCO component | Mercury lamps | LED UV |
|---|---|---|
| Lifespan | 500-1,000 h | 10,000-20,000+ h |
| Energy use (relative) | 100% | 10-30% |
| Replacement cost (5 years) | Significant | Minimal |
| Risk of heat-damaging media | High | Low |
| Health, safety and ventilation needs | More demanding | Lighter |
An LED UV savings calculation
For a shop running 2,000 h a year:
Mercury lamps:
- Lamp replacement: 2-4×/year × 2,000 PLN = 4,000-8,000 PLN
- Energy (5 kW × 2,000 h × 0.80 PLN/kWh) = 8,000 PLN
- Cooling (estimated): 2,000 PLN
- Total curing OPEX: 14,000-18,000 PLN/year
LED UV:
- Module replacement: 0 PLN (life >10 years)
- Energy (1 kW × 2,000 h × 0.80 PLN/kWh) = 1,600 PLN
- Cooling: minimal
- Total curing OPEX: ~2,000 PLN/year
Saving: 12,000-16,000 PLN a year, which over five years comes to 60,000-80,000 PLN – often enough to cover the price gap between a lamp-based device and an LED one.
13. A Practical ROI and TCO Calculation
Here’s a TCO calculation template you can adapt to your own situation.
UV print costs are usually counted per square metre, which lets you pin down the production cost for a given area. A minimum order can be as little as 1 m², and you can run anything from small to large quantities depending on what the client needs.
TCO calculation template (5 years)
CAPEX (one-off):
| Item | Amount (PLN) |
|---|---|
| Device price | [___] |
| Installation and commissioning | [___] |
| Initial training | [___] |
| Infrastructure (ventilation, power) | [___] |
| RIP software | [___] |
| Tooling (jigs, tables) | [___] |
| TOTAL CAPEX | [___] |
OPEX (annual):
| Item | Amount (PLN/year) |
|---|---|
| Inks (l/year × PLN/l) | [___] |
| Media (m²/year × PLN/m²) | [___] |
| Energy (kWh/year × PLN/kWh) | [___] |
| Service and maintenance | [___] |
| Wear parts | [___] |
| Printheads (depreciation) | [___] |
| Lamps/LED (depreciation) | [___] |
| Operator labour | [___] |
| TOTAL OPEX/year | [___] |
Hidden costs (annual):
| Item | Amount (PLN/year) |
|---|---|
| Purge/cleaning waste (~3% of ink) | [___] |
| Lead-in and waste (~2-5% of media) | [___] |
| Unplanned downtime (h × cost/h) | [___] |
| Operator turnover (estimated) | [___] |
| TOTAL hidden costs/year | [___] |
A UV printer can cost roughly $2,500 to $41,200 depending on the model and features, and that initial investment strongly affects long-term profitability.
UV printing usually has higher upfront setup and ink costs than traditional methods, but lower operational and material costs for short to medium runs.
5-year TCO:
TCO = CAPEX + (OPEX × 5) + (Hidden_costs × 5)

Cost to print 1 m² (average):
Cost/m² = TCO / (Annual_production_m² × 5)

Optional imperial view for budgeting by square foot:
Cost per square foot = TCO / (Annual_production_sq_ft × 5)
A comparative calculation
| Parameter | Plotter A (budget) | Plotter B (premium) |
|---|---|---|
| CAPEX | 200,000 PLN | 350,000 PLN |
| OPEX/year | 150,000 PLN | 100,000 PLN |
| Hidden costs/year | 20,000 PLN | 10,000 PLN |
| Production/year | 10,000 m² | 15,000 m² |
| 5-year TCO | 1,050,000 PLN | 900,000 PLN |
| Cost/m² | 21.00 PLN | 12.00 PLN |
The takeaway: the more expensive plotter has a 14% lower TCO and a 43% lower unit cost, despite the higher CAPEX.
14. FAQ: Common Questions About UV Printing Costs
What does it really cost to print 1 m² in UV?
It depends on coverage, white and varnish use, print mode and machine throughput. A typical range: 8-25 PLN/m² for CMYK, 15-50 PLN/m² with white and varnish. UV print is most often priced per square metre, which makes production planning and cost control easier. Average UV print costs in Poland run from 30-80 PLN/m² for simple prints on standard substrates up to 200-500 PLN/m² on premium materials. What matters is calculating your own TCO, not relying on generic figures.
Does cheaper ink always lower costs?
No. Cheaper ink may need a thicker layer, cure worse, clog heads more often or give poorer colour. What counts is cost per m² at the required quality, not price per litre. That said, good-quality compatible inks can give a comparable result at a lower cost.
How often do printheads need replacing?
With proper maintenance: 2-5 years. The main things that shorten head life: irregular use (drying), poor ink, neglected cleaning routines and a dirty working environment.
LED UV or traditional lamps – which pays off?
Over 3-5 years, LED UV almost always wins on TCO. The higher CAPEX is paid back through 70-90% lower energy and maintenance costs. The exception: very low volumes, where the CAPEX gap never gets the chance to pay off.
How do I cut ink consumption?
- Set up GCR/UCR in the RIP (15-30% saving)
- Match the ink limit to the application
- Use spot mode for white (instead of flood)
- Match resolution to what the job needs
- Calibrate colours regularly (avoid over-inking)
What matters more for TCO – ink price or machine throughput?
At low volumes (<500 m²/month), machine throughput, because fixed costs dominate. At high volumes (>2,000 m²/month), ink price, because variable costs dominate. In practice both matter, but throughput is the one that gets underrated.
How do I work out the ROI of a UV plotter?
ROI = (Annual savings or extra revenue - Annual cost of ownership) / Investment × 100%A typical ROI for a UV plotter at full utilisation: 25-50% a year, which means payback in 2-4 years.
Is it worth investing in more expensive heads (Kyocera over Ricoh)?
For industrial production and high volumes – yes. Higher reliability, less purge waste and higher throughput offset the price difference. For low volumes and a tight budget – not necessarily.
What are the biggest budget killers in UV printing?
- White ink in flood mode (use spot!)
- Resolution or pass count set too high for the job
- Downtime (unplanned and planned)
- Purge waste from poor maintenance
- Operator turnover (the hidden cost)
How do I compare quotes from different suppliers?
Don’t compare purchase price – compare TCO. Ask for:
- Real throughput figures (not catalogue numbers)
- Ink consumption at different coverage levels
- Service and parts costs over five years
- Head and lamp lifespan
- References from users with a similar production profile
15. Summary
Controlling cost in UV printing takes a whole-system view – from the choice of printhead technology, through advanced colour management in the RIP, to how the operator handles the machine’s mechanical parameters day to day.
Key takeaways
- Ink price is not print cost. The real cost is TCO: CAPEX, OPEX and hidden costs.
- Machine throughput is the critical variable. At high throughput, fixed costs spread across more production, pulling the unit cost down.
- RIP tuning is “free” saving. GCR, UCR and the right ink limit can cut ink consumption by 15-30%.
- LED UV wins on TCO. Over 3-5 years, energy and maintenance savings cover the higher CAPEX.
- Multi-layer printing rewrites the math. With white and varnish, throughput drops threefold or more – build that into your quotes.
- Hidden costs are real. Purge waste, lead-in, downtime and operator turnover can make up 5-10% of TCO.
- A more expensive device can have a lower TCO. Higher reliability, throughput and energy efficiency offset the price gap.
Next steps
- Audit your current costs – measure real ink, media, energy and time use
- Calculate your TCO – use the template from this article
- Find the areas to optimise – RIP, print modes, maintenance
- Compare scenarios – your current machine against a new investment
- Talk to the experts – match the technology to your production profile